
We were very excited to be given 15 days to produce a piece of work at ReFab Space in Sheffield. The aims of the residency were to explore how artists could work in the space and how new fabrication technologies could impact on what was produced. We had met several times before the residency started to discuss ideas, but chose not to make any final decisions until we had got a feel for the space and what facilities and resources were available to us.
On arriving we knew that we wanted to make a puppet, and we also had a shortlist of animals and behaviours we both agreed would be challenging and exciting to tackle.
After some deliberation, we decided on making a cormorant puppet. Our main reasons were that it is one of the few birds that displays its impressive wingspan while standing and walking (to dry off its non-waxy feathers), and also that its ancient and prehistoric look allowed a lot of scope for conveying a sense of character.

Research
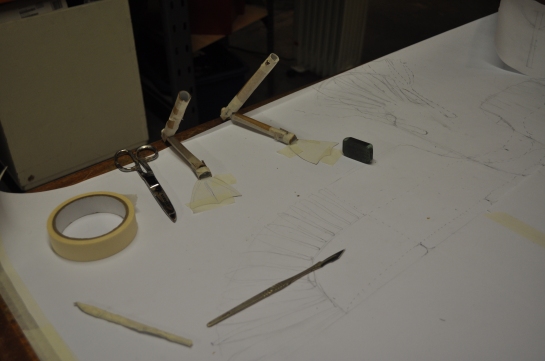
We started our research with a lot of drawing and sketching – figuring out how the birds look in varying positions and from different angles, and also spending some time studying their skeletons and musculature. Videos were very useful in trying to figure out what the essence of a cormorant’s movement is, and how this could be best reflected in what we produced.

Once we had a good feeling for the basic elements of a cormorant, we constructed a rough card prototype. This became very useful to refer back to as the project progressed. It allowed us to get a better feel for a suitable scale of the final piece, as well as letting us see how the sections of the body related to each other.

From the card prototype, we were able to produce a much more detailed scale diagram to work from.
We decided to scale up a little from the initial prototype, and settled on the ambitious aim of a 100cm wingspan. This would mean keeping the weight of the wings as low as possible so that the resulting leverage did not restrict the amount of control and ease of operation that a puppeteer would need.
Another thing we had to consider was how the puppet would be operated. We realised pretty quickly that this would need to be a two-person puppet because of the wide range of movements we were aiming incorporate (head/neck articulation, opening and closing beak, pull back motion of wings from ‘shoulder blades’, opening and closing of wings, and walking with ‘knee’ and ‘ankle’ articulation). We needed to make sure that it would be comfortable for performers to use, but would also leave as much of the puppet itself on view as possible. We went through lots of complicated permutations with rocker controls and triggers, but then decided that a traditional table-top approach with rods would be the most simple and elegant solution for a puppet of this scale.
At this stage we were also keen to leave scope to introduce motors and sensors into the design, especially because of the expertise and technical help available at ReFab Space.
Use of Software/Open Source
We found learning how to work with Linux and the vector design software used at AccessSpace and ReFab Space a steep but rewarding learning curve. The ethos of accessibility at AccessSpace is inspirational. The use of open source software combined with the strong technical knowledge and support and the easy access to good computers liberates this sort of design technology from expensive academic learning environments and makes it available to a hugely widened audience. We think that the work being undertaken at both spaces is quietly radical and powerful, reminiscent of the hackspace model in attracting a diverse range of users.
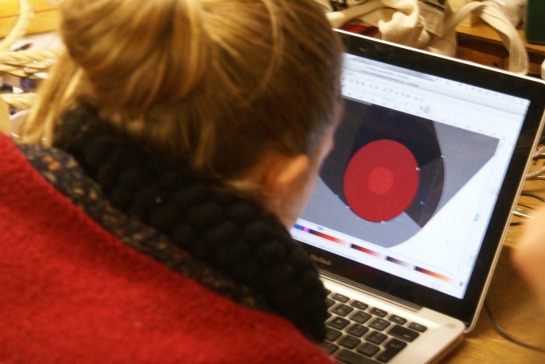
With a great introduction to the program basics from Martin, we were quickly putting together vector versions of our balsa legs, ready for laser cutting!
Legs and feet
The balsa legs were made while we were getting used to the way that the ReFab Space worked and learning how to produce the files for the laser to cut correctly. One thing we discovered early on was that the space was furnished with very different tools to workshops that we were used to. We would usually have made rough prototypes of limbs and other pieces on a band saw, but as there was none available, we chose to work in balsa, which can be easily and quickly cut with a scalpel or craft knife. Although obviously not very strong, this turned out to be a great way of working, because then the shapes we formed could be relatively quickly reproduced in Inkscape, and then laser cut in much more robust ply… very accurately!

The legs were built from three layers of plywood, each with a certain shape to limit the range of movement in the limb. This is quite a common building technique for puppets, particularly string puppets (marionettes), but applying it to produce exactly the range of movement we were after did take a bit of head scratching… the final mechanism works very nicely.
Another thing we looked at early on before we got proficient with the vector program was additional movement in the feet to give a bird-like clench of the toes as they were lifted. We experimented with a range of active and passive designs, and produced effects that were very strong, if not very cormorant-like.
At this stage, the movement is much more chicken-like, or even monkey-like! If we had pursued this avenue, the next thing would have been to make the clenching action much less exaggerated, and actuating at a later stage in the foot lift.
What we actually did was to change the placement of the controls on the legs so that they were operated by a rod attached directly to the foot. This should allow the puppeteer to have a huge amount of control and dexterity with a simplified rigid foot, with very little effect to the overall impact of the puppet.
The new simplified feet were very pleasing to put together. The pieces came out of the laser cutter like a jigsaw!

The leathery-looking webbing (and the side of the mouth) were constructed from dyed and treated brown bag paper, and are surprisingly robust.
Wings
Working with balsa and then jumping straight to a finished ply joint was a new way of working for us, but the laser cutter really came into its own when we began work on the cormorant’s wings.

Meccano wings for experimenting with joints
We constructed the wings by working with a series of linkages in a parallelogram format (a little bit like a garden trellis). Because each linkage acts upon another, even very small changes can have a big impact on how the wings open and close. To avoid the need to make a huge number of different versions, or to add holes in a time consuming way with a hand drill, we designed and laser cut a type of wing Meccano. This meant we could make subtle adjustments very easily until we had found the movement we were after. Emma had seen this work effectively on a previous project with creative technology company Rusty Squid. The difference here was that once we were happy with the opening and closing action, we intended to refine the wing mechanism and leave it visible, creating a bony, prehistoric aesthetic.
The picture below shows this progression at various stages. Once the placement of the holes had been established, it was easy to modify the file to get rid of the superfluous holes. The next stage was the shaping of the struts to resemble bone, and finally the sanding and staining of the wood.

The wood staining itself was a breakthrough for us. We had planned to test all our files in plywood and then to re-cut them in a nicer wood (oak, walnut etc). The wood stain took to the ply really well, and the look was transformed from laser cut pieces of ply! This was a boon because using another sort of wood at this stage had three big disadvantages: expense, time needed for adjusting settings, concerns about strength over thinner sections.

Head
We spent some time discussing how pegs are sometimes used as the base for mouth mechanisms in small- and medium-sized puppets. We realised that with the vector drawing skills we now had, we could model a shape based around a peg mechanism, laser cut this, add a spring from a peg and adapt it directly for our own puppet’s head.

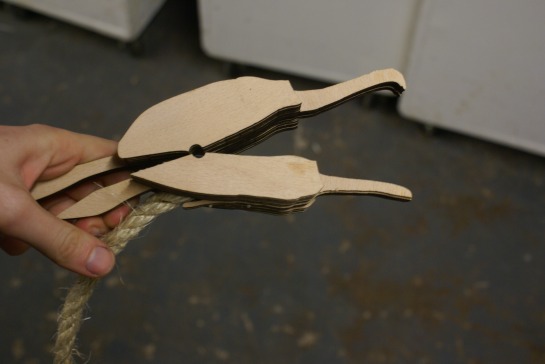
As the laser cutter only cuts through thin pieces of wood, we began to experiment with making a three dimensional head by layering up laser cut pieces of ply. This meant that the central piece of ply could also incorporate the ‘peg’ mechanism for opening and closing the beak. Instead of Inkscaping the head shape, we scanned in drawings of the head in the shape we wanted. It was exciting to be able to work with hand drawn images again rather than vectors, and we were then able to join these to the ready-made peg design. It seemed like a great use of the tools available to us – using hand drawing and scanning for the parts for which we wanted to have aesthetic control, and then using the computer to draw the parts which we needed to be accurate and precise. We also altered the shape of some of the inner pieces to include space to attach the neck.
One problem we encountered on the first head was that the peg, now 10cm thick, closed slightly sideways. We altered the files to include interlocking guides which keep the two halves of the beak aligned. After two or three attempts we had 15 very carefully designed shapes – which looked like a shoal of weird fishes when we laser cut them!

Layered up, they opened and closed like a beak and had a small gap for the neck.
The next job was shaping the ply head by sanding down and whittling, using a finger sander, dremel and a carving knife. Earlier sketches we had made of the cormorants head came in useful at this point.

At times it seemed like a strange way of working – building up layers of thin wood and the sanding them back down seemed a bit counter-intuitive. But it had big advantages – the peg mechanism inbuilt in the centre, and the fact that all the shapes are saved as files which could be easily adapted or re-cut.
Our first idea for the eye was to embed a small wooden bead into the head, and this seemed to work well. We found that by using dyed brown paper around the bead, we could change the expression and give the eye a more natural look.

Neck
The neck of the cormorant is a distinct, snaky curve, and our first idea was to use plastic tubing which would then be covered with something more natural looking. Eventually, we decided to use thick rope which would not need covering – we wanted to avoid having to disguise materials to achieve the aesthetic that we trying to produce. The rope seemed to fit in well with seabird imagery and had a similar quality to the play wood when dyed.

We knew we wanted to make the neck using round discs, and at an early stage we decided to go for a skeletal, prehistoric look in which the actual vertebrae would be visible. My first experiment with Inkscaping the vertebrae may be a good example of how CAD can hinder, rather than help in the creative process! It’s very tempting to make shapes as intricate as possible just because you can, and the first set of ‘vertebrae’ when we had cut them didn’t feel right at all.
After a few attempts we went back to the idea of simple, circular discs, which had the clean, sleek look we had wanted from the beginning. With the laser cutter and CAD it would be easy to stray away from simplicity and function without any particular reason. It was interesting to see how computers could affect our approach to design, for better or worse.
Body
We had anticipated the body to be a straight-forward build – but it turned out to be much trickier than that!
We referred back to our initial models and sketches for shape and scale ideas.
One problem we encountered is that cormorants’ bodies are very changeable, stretching out and slimming as they reach upwards, and becoming thicker and fatter when they rest. We were aiming to find a good compromise between all positions.
We began with a similar approach to the wings – making a basic cross-section spine-style shape with a series of holes removed from it.

The bulk of the body in earlier attempts was built up with woven cane through the holes. This was a very unsatisfying way to work – the remaining holes were very distracting and the seemingly limitless possibilities overwhelming. It also felt as though it might not be very strong in the long term, and that the approach might not be making the most of the facilities available to us.

We then paired the cane right back to simple defining curves. The addition of a ply chest bone also helped to suggest structure and bulk. The real breakthrough for the body came when we considering layering up the body shapes in the same way as the head – suddenly, we had a much more tangible and clear shape that retained a substantial nod to its means of manufacture.
Feathers
We had a working mechanism for the wings, but the greatest challenge was still to come – attaching feathers which would open and close. We decided to use a design similar to an old fashioned fan – slats of thin wood which pivot at one end and overlap each other.
After much discussion about materials, we ordered 3.5mm birch ply, not quite knowing whether it would be suitable. It’s sold for making model aeroplanes, and had the advantage of being extremely light. We found it could be cut easily with scissors into the shapes we wanted. We experimented using mapping pins and roughly cut feathers, sewn together with thread so that they would pull in the right way when opened and closed.

It was very difficult to get the tension of the thread and pivot points right, and gave us a new appreciation for the design of birds wings in general, and the way the feathers fold so perfectly as the wings fold against the body.

Attaching feathers made us feel as if we were on the way to finishing the puppet, and we were able to roughly put together the finished elements to get a sense of whether our designs were working in terms of movement and feel.

It was exciting to see the head and wings working together and see that the aesthetic we had gone for with each part of the puppet did seem to work together well.The next stage involved a lot of tweaking and adjusting of controls and attachments in order to finally put it together.

We also wood dyed the finished pieces.

The picture above shows the cormorant almost finished, yet the final stages took longer than we anticipated.The triggers for the wings and the arranging of feathers had to be carefully considered.
We feel that the puppet we have produced here has many areas which we would like to develop, but provides us with a much better understanding of how we would go about producing something similar, and we hope that it may be of use to others experimenting in the fascinating world of puppetry.


